

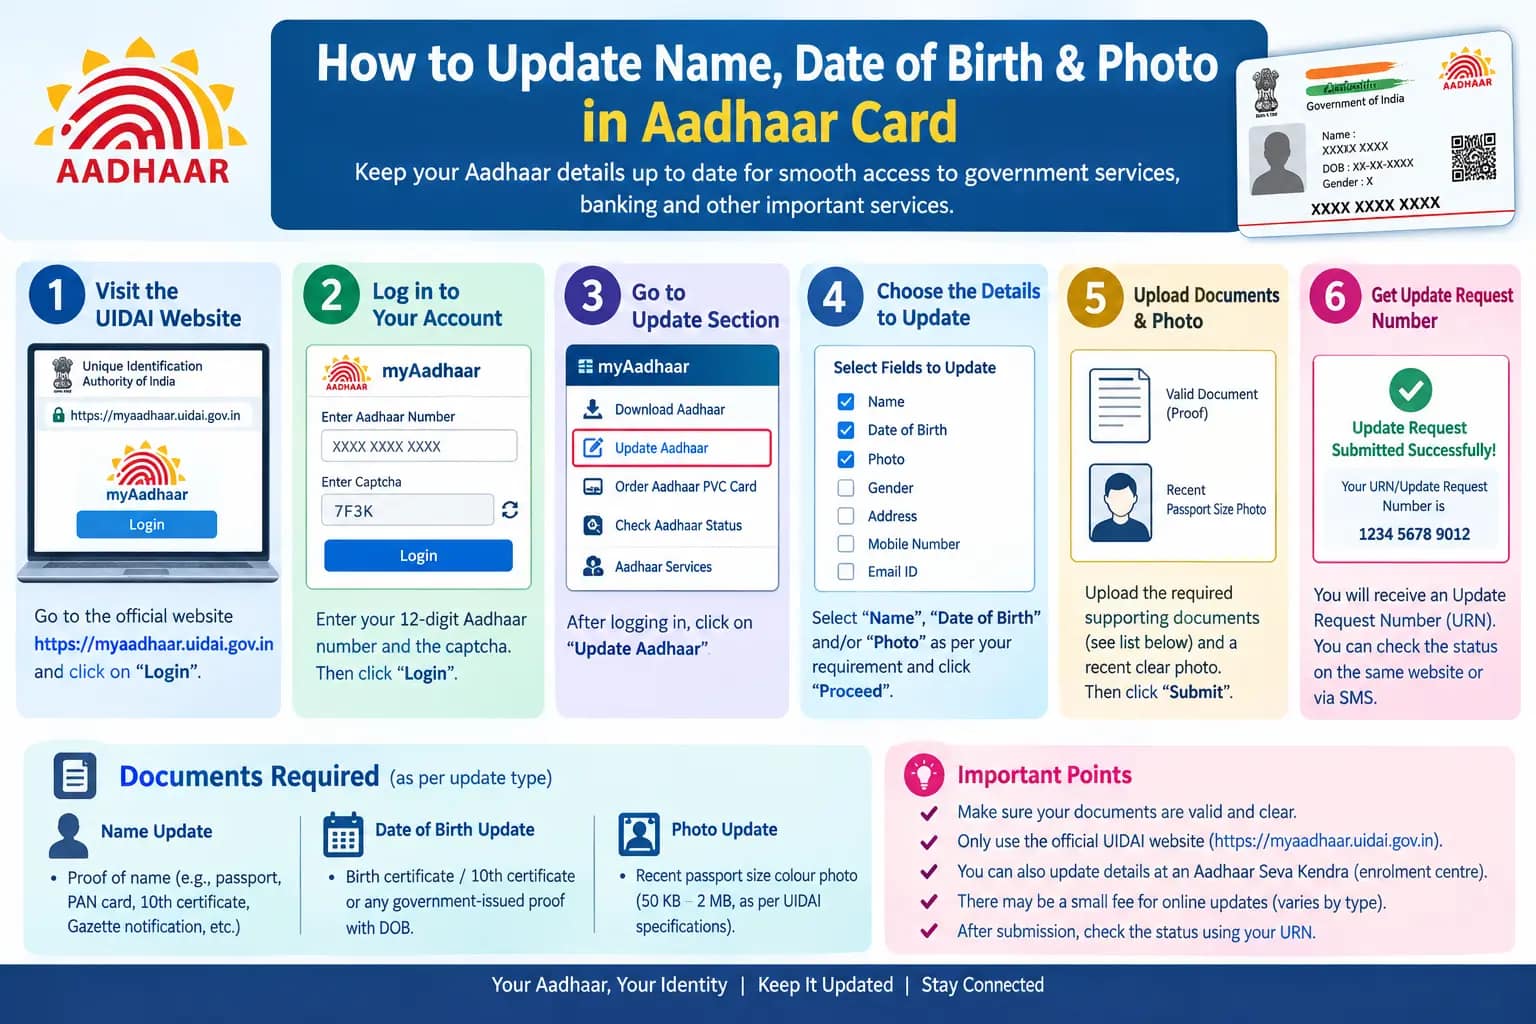
Your bank is asking for Aadhaar e-KYC before the month ends. Your passport application got flagged because the date of birth on your Aadhaar does not match your Class 10 certificate. Or the OTP simply refuses to arrive because your mobile number was never linked to Aadhaar. These are the moments when a demographic update stops being a formality and becomes urgent. This guide walks through how to update photo in Aadhar, correct your name, and fix your date of birth using official UIDAI (Unique Identification Authority of India) channels — and what to do when a full Aadhar card pic still shows the wrong details after an update.
Every enrolled person holds a 12-digit Aadhaar number, an EID (Enrolment ID, the 28-digit number on your enrolment slip), and can generate a VID (Virtual ID, a temporary 16-digit number that works in place of your Aadhaar number). Changing any of these linked details — name, address, date of birth, gender, mobile, email, or photograph — counts as a demographic update, and UIDAI permits it only through its own systems.
Read More About👇
Why the Details on Your Aadhaar Matter More Than You Think
Aadhaar is now the backbone of verification for PAN, bank accounts, SIM cards, ration cards, scholarships, and pensions. One mismatched letter in your name, or a date of birth that differs from your board certificate, is enough to stall a verification. An outdated photograph causes the same trouble during in-person checks.
The updates people request most often:
- A spelling error or shortened name in the Aadhaar record
- Name change after marriage, including surname or husband’s name
- Father’s name entered incorrectly at enrolment
- An approximate date of birth filled in years ago
- A photograph that is blurred or no longer resembles the person
What You Can Actually Change in Aadhaar
UIDAI generally permits updates to name (including surname), date of birth, gender, address, mobile number, email, photograph, and father’s or husband’s name where it appears in the record. Biometric changes — fingerprints and iris — follow a separate process and normally need a centre visit.
Step-by-Step: Updating Your Photo, Name, and Date of Birth
You have two routes: online via uidai.gov.in or the mAadhaar app, or in person at an Aadhaar Seva Kendra or an authorised enrolment centre. The online route handles document-based requests; a photograph update almost always requires a live capture at a centre, so plan for that visit.
- Log in to the UIDAI self-service portal. Open the “Update Aadhaar” section on uidai.gov.in and sign in with your Aadhaar number or VID. An OTP goes to your registered mobile. No registered mobile? You must visit a centre first — this is the single biggest blocker people hit.
- Choose the demographic update option. The portal lists the fields open for online editing. Name and date of birth requests are usually accepted here with document uploads attached.
- Enter details exactly as they appear on your proof. If your passport reads “Ramesh Kumar Sharma,” do not type “R K Sharma.” A single mismatch between your Aadhaar request and your document is the most common rejection trigger.
- Upload your scanned proof. Keep the scan sharp, uncropped, and within the file size and format limits shown on the page. Blurred or tilted images get returned.
- Submit and save your URN. You will receive an Update Request Number. Write it down or screenshot it — this is your only reliable way to track aadhar card photo update status or any other request later.
- Book a centre appointment for the photograph. Use the appointment option on the portal or mAadhaar app, then carry your original Aadhaar (or EID slip) plus original documents. The operator captures a fresh live photo and biometrics on the spot. Walk-ins are accepted at many centres, but appointments save hours.
- Keep the acknowledgement slip. It carries your URN and proves your request was accepted. Store it until the update reflects in your record.
- Track, then download. Once processed, download the updated e-Aadhaar. A physical reprint can be ordered separately — check the portal for the current fee, as UIDAI revises charges from time to time.
Two pitfalls worth knowing. First, the portal session times out quickly; keep your documents scanned and ready before you log in, or you will be filling the form twice. Second, if the OTP does not arrive, do not keep hitting resend — check that your mobile is actually seeded in your Aadhaar record, because an unlinked number will never receive it.
Prefer offline? The same updates can be made at an Aadhaar Seva Kendra, at authorised bank or post office centres, or through the Aadhaar Enrolment/Update Client software that operators use. What you should never do is approach an unofficial agent promising instant changes. Aadhaar updates run only through UIDAI-authorised channels.
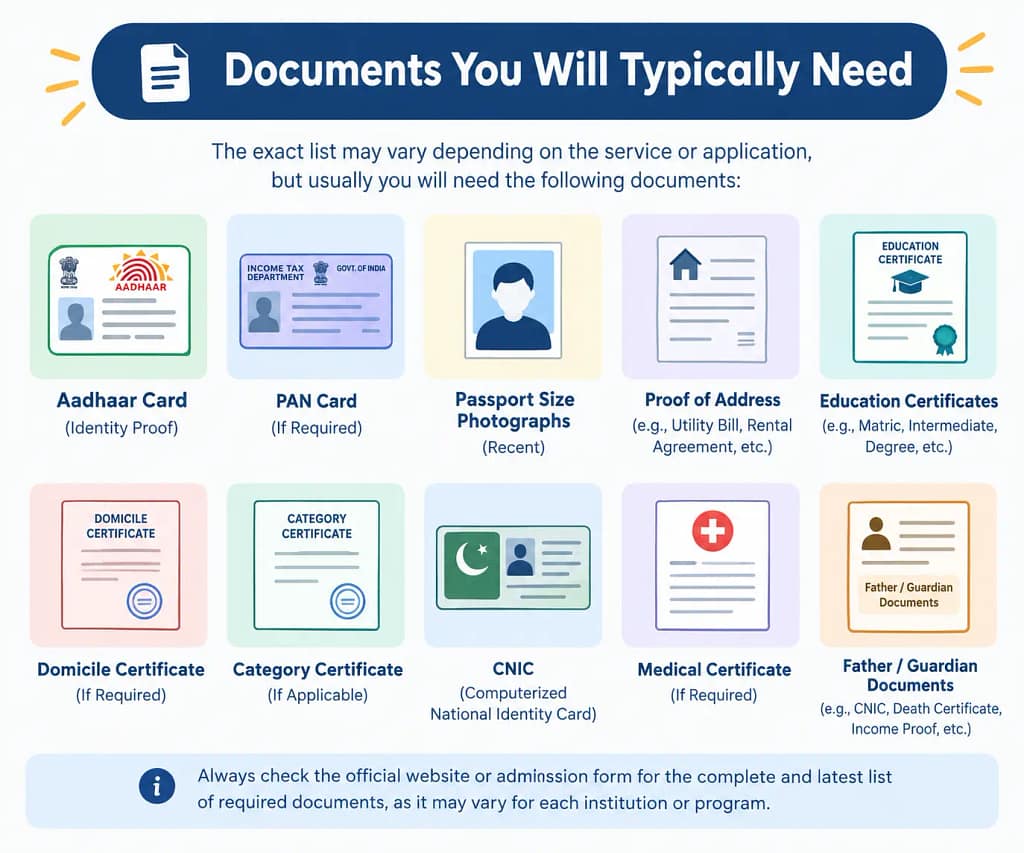
Documents You Will Typically Need
UIDAI maintains a defined list of acceptable proofs for identity and date of birth, and it is revised periodically. Confirm the current list on uidai.gov.in before you travel to a centre. Broadly:
For Name Change or Correction
- Passport
- PAN card
- Voter ID
- Driving licence
- Government or PSU employee service photo identity card
- Marriage certificate, for a name change after marriage
- Gazette notification, for a formally registered name change
For Date of Birth Change
- Birth certificate
- Class 10 or Class 12 marksheet or certificate showing date of birth
- Passport
- PAN card, accepted in some cases
- Government-issued date of birth certificate
For Photograph Update
No separate document is generally required — the photo is captured live at the centre. Still, carry your original Aadhaar and one identity proof.
If your documents are not in English or Hindi, a certified translation may be needed. Cases like a father’s name change, a surname change after marriage, or a correction with no standard supporting paper often attract additional proof requirements, so verify your specific case before applying.
Mistakes That Get Requests Rejected
- Blurred or cropped uploads. Poor scans are a leading cause of rejection.
- Spelling mismatches. Your Aadhaar request must mirror your proof document word for word.
- Submitting a photo of a photo. The photograph update needs a live capture at the centre, not a print you bring along.
- Losing the URN. Without it, tracking your request becomes guesswork.
- Using unofficial agents. Only UIDAI-authorised centres and the official portal or mAadhaar app are legitimate.
- Believing random timelines. Processing periods vary; check the portal rather than trusting numbers forwarded on messaging apps.
Frequently Asked Questions
1. Can I update my name in Aadhaar online?
Generally yes, through the UIDAI portal, provided you upload valid supporting documents. If your mobile number is not registered, a centre visit comes first.
2. Can I change my date of birth in Aadhaar card online?
A request can typically be initiated online, but approval depends on your proof being on UIDAI’s accepted list. Some cases still require a centre visit.
3. What documents are required for a name change in Aadhaar card?
Passport, PAN card, voter ID, driving licence, marriage certificate, and gazette notification are commonly accepted. The list changes, so confirm on uidai.gov.in.
4. How can I update my photo in Aadhaar card?
Book an appointment at an Aadhaar Seva Kendra or authorised centre, where a fresh live photograph is captured. Carry your original Aadhaar and one identity proof.
5. How do I check my Aadhaar update status?
Enter the URN from your acknowledgement slip on the UIDAI portal. Basic details like your date of birth in Aadhaar card can also be verified through the official site’s verification options.
6. Is there any risk of fake Aadhaar updates?
Yes. Never share your OTP, VID, or biometrics with unauthorised agents. Fake Aadhaar cards and fraudulent updates are punishable offences.
If your update still shows no change a few weeks after submission, don’t resubmit immediately — that creates duplicate requests and can slow things down further. Check the status with your URN first, and if it has been rejected, read the rejection reason on the portal carefully; it almost always points to the exact document or spelling issue you need to fix before applying again.