

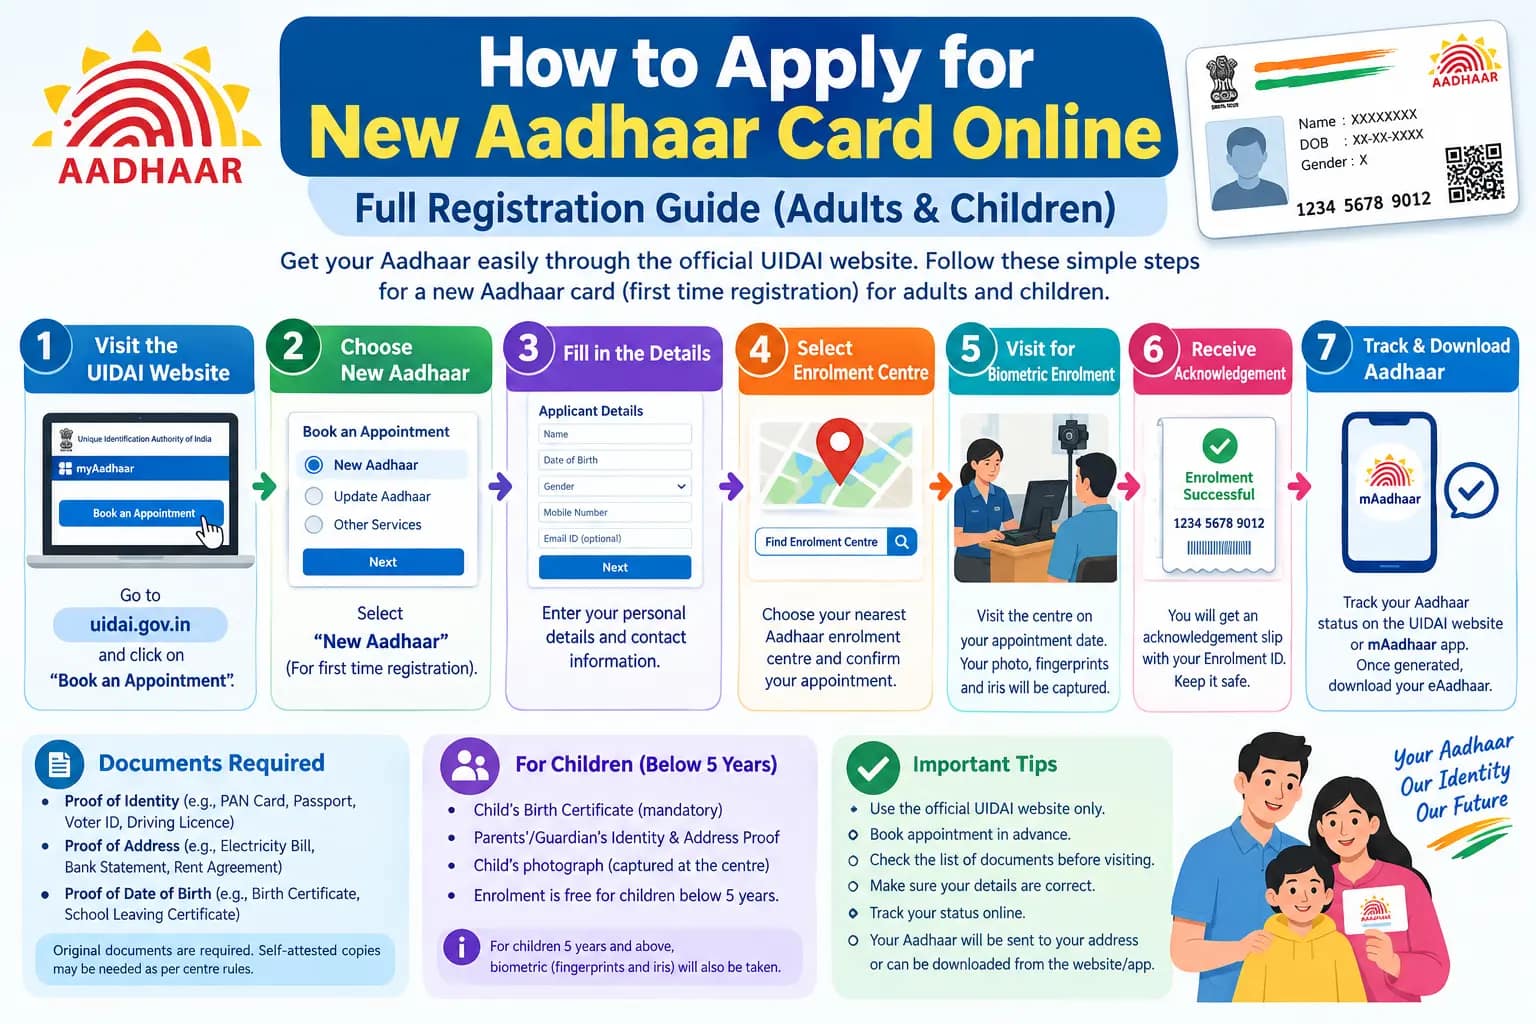
You need Aadhaar for a bank account, a SIM card, a school admission, or a subsidy transfer. But somewhere in the middle of searching “new aadhar card apply online”, you hit a wall: the form isn’t downloadable, the centre near you is closed, or you’re not sure whether you can do any of this from home. Here’s the honest answer up front — a brand-new Aadhaar cannot be created entirely online, because fingerprints, iris scan, and photo must be captured in person. What you can do online is find an authorised centre, download the enrolment form, and later manage your Aadhaar through the myAadhaar portal. This guide covers the actual steps for adults and children, the documents that work, and the mistakes that push enrolments back by weeks.
What “Apply Online” Really Means for Aadhaar
UIDAI (Unique Identification Authority of India) issues the 12-digit Aadhaar number. The enrolment itself happens at a centre: you fill the form, submit identity and address proof, and an operator captures your demographics and biometrics. In return you get an acknowledgement slip with a 28-digit Enrolment ID (EID) — your tracking number until the Aadhaar number is generated.
So there is no website or app that lets you skip the physical visit. What the online layer handles is everything around that visit: locating centres, downloading and prefilling forms, booking appointments where available, and — once you have Aadhaar — updating details, downloading e-Aadhaar, and checking status. Most people searching for get aadhaar or get aadhar online are actually looking for these supporting services, not a fully remote enrolment.
Read More About👇
Step-by-Step Process for Adults Enrolling for a New Aadhaar
Step 1: Find an Authorised Enrolment Centre
Any authorised centre in India will accept you, regardless of which state your address falls under. UIDAI runs Aadhaar Seva Kendras (ASKs) in many cities alongside registrar-run centres. Use the centre locator on uidai.gov.in and search by PIN code or current location. UIDAI also lists authorised centres on the Mappls app (through its MapmyIndia partnership), which helps you avoid unauthorised operators who charge extra for the same free enrolment.
Pitfall: Some private shops display “Aadhaar work done here” boards without authorisation. If the centre isn’t listed on the UIDAI locator or Mappls, walk away.
Step 2: Fill the Aadhaar Enrolment Form
Download the enrolment form from the UIDAI website beforehand — it saves time at the counter and lets you check spellings calmly. You’ll enter name, date of birth, gender, address, and optionally mobile number and email. The mobile number is worth adding: it becomes your channel for OTPs, status checks, and most online Aadhaar services later.
Pitfall: Entering your name or date of birth differently from your existing documents. Even a missing middle name or a different date format can create a mismatch that complicates bank KYC later.
Step 3: Submit Documents and Give Biometrics
Carry one valid Proof of Identity (PoI) and one valid Proof of Address (PoA). Commonly accepted PoI documents include election photo ID card, ration card, passport, driving licence, and government-issued ID cards. For PoA, utility bills (water, electricity, landline) from the last three months are typically accepted, as is an address certificate with photo issued by an MP, MLA, Gazetted Officer, or Tehsildar on letterhead.
The operator scans your documents, captures all ten fingerprints, an iris scan, and a facial photograph, then hands you the acknowledgement slip. Enrolment is free — check the UIDAI portal for the current position on any update fees.
Pitfall: Dry or worn fingertips can cause fingerprint capture failures, especially for manual labourers and older applicants. Moisturising your hands the night before genuinely helps; repeated failures may mean a return visit.
Aadhaar for Children: How the Process Changes
Enrolment rules shift with the child’s age, and this is where most parents get confused.
Under 5 years: Enrolment runs through the Head of Family (HoF) system. One parent or guardian must have a valid Aadhaar, the child’s Aadhaar address is tied to the HoF’s address, and that parent’s biometric authentication plus a signature on the form counts as consent. A birth certificate is the primary document for proving date of birth and relationship. This is the standard route for apply aadhar card online for child searches — though as with adults, the enrolment itself is completed at a centre.
5 to 18 years: Parental consent via signature is still mandatory. If the child has their own document — a school ID card, for instance — it can be used directly. If not, the Head of Family route stays open using the parent’s documents plus a Proof of Relationship.
One date every parent should note: biometric updates are mandatory when the child turns 5 and again at 15. Skip these and the Aadhaar can go inactive at a point when you actually need it — exam registrations, passport applications, or scholarship disbursements.
Documents Required for Aadhaar Card Enrolment
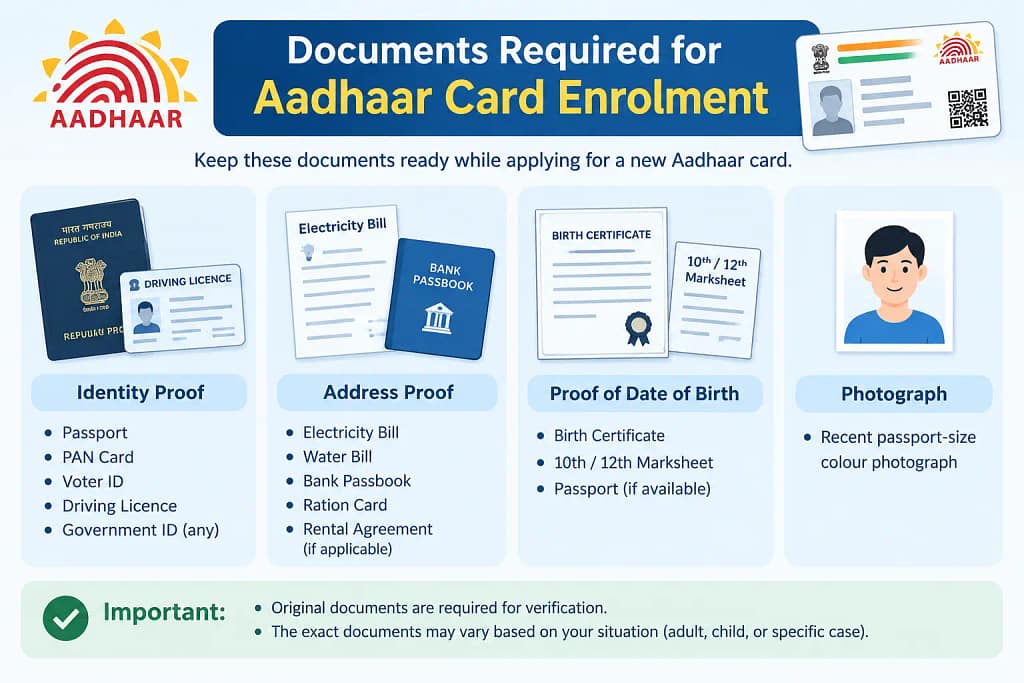
For adults, UIDAI’s list is deliberately broad so that most people can produce at least one document from each category. Identity proof options commonly include election photo ID card, ration card, passport, driving licence, and government-issued ID cards. Address proof leans on recent utility bills, rent agreements, or the MP/MLA/Gazetted Officer/Tehsildar certificate on letterhead.
For children, requirements track age: birth certificate under 5, then school ID or any valid document in the child’s own name from 5 to 18, falling back to Head of Family documents and a Proof of Relationship where nothing exists in the child’s name. If your documents are in a regional language, the centre will typically accept them, but carrying a self-attested translation avoids delays.
Common Mistakes That Delay Aadhaar Enrolment
The single most damaging error is inaccurate data on the form — a misspelt name, wrong date of birth, or address that doesn’t match your proof. Aadhaar is a foundational ID, and correcting it later means a separate update request, a fee, and another visit.
The second is skipping the mobile number. It’s marked optional, but without a registered mobile you lose easy access to OTP-based services, e-Aadhaar download, and most online updates. UIDAI has added alternatives for certain services, such as ordering a PVC card without a registered number, but life is simpler with one linked.
The third is treating the acknowledgement slip as disposable. That EID is your only handle on the application until the Aadhaar number arrives. Photograph it, store it in your email drafts, do whatever it takes to keep it findable.
Frequently Asked Questions
Can I get a completely new Aadhaar without visiting a centre?
No. Biometric capture — ten fingerprints, iris, and photograph — requires physical presence at an authorised enrolment centre. Online tools cover centre location, form download, and post-enrolment management only.
How do I find an aadhaar enrollment centre near me?
Use the centre locator on uidai.gov.in with your PIN code, or check the Mappls app where UIDAI’s MapmyIndia partnership lists authorised centres.
Is Aadhaar enrolment free for children too?
Yes. Enrolment is free at authorised centres for all ages. Certain update services carry a fee — verify the current amount on the UIDAI portal rather than relying on older figures.
Can my child get Aadhaar without a birth certificate?
Under 5, the birth certificate is the primary document for date of birth and relationship, so it’s effectively required. Between 5 and 18, if the child has no document in their own name, enrolment can proceed under Head of Family using the parent’s Aadhaar and a Proof of Relationship.
What’s the difference between EID and the Aadhaar number?
The EID is a 28-digit number on your acknowledgement slip, used to track the application while it’s being processed. The Aadhaar number is the 12-digit number issued once enrolment is complete — that’s what you quote everywhere afterwards.
Can NRIs apply for Aadhaar?
Yes. An NRI holding a valid Indian passport can enrol at any Aadhaar Kendra in India. Children of NRIs have their own document requirements, so check the UIDAI portal for the current list.
Before You Go
Fees, document lists, and timelines shift with UIDAI circulars, so treat everything here as a working guide rather than a fixed rulebook — confirm the specifics on uidai.gov.in or through the UIDAI toll-free helpline before you travel to a centre. One practical habit: keep a photo of your acknowledgement slip on your phone and set a reminder to check enrolment status about a week after the visit. If the status sits unchanged for an unusually long stretch, or the Aadhaar hasn’t arrived by the time you need it for a deadline, that slip and your EID are what the helpline will ask for first.